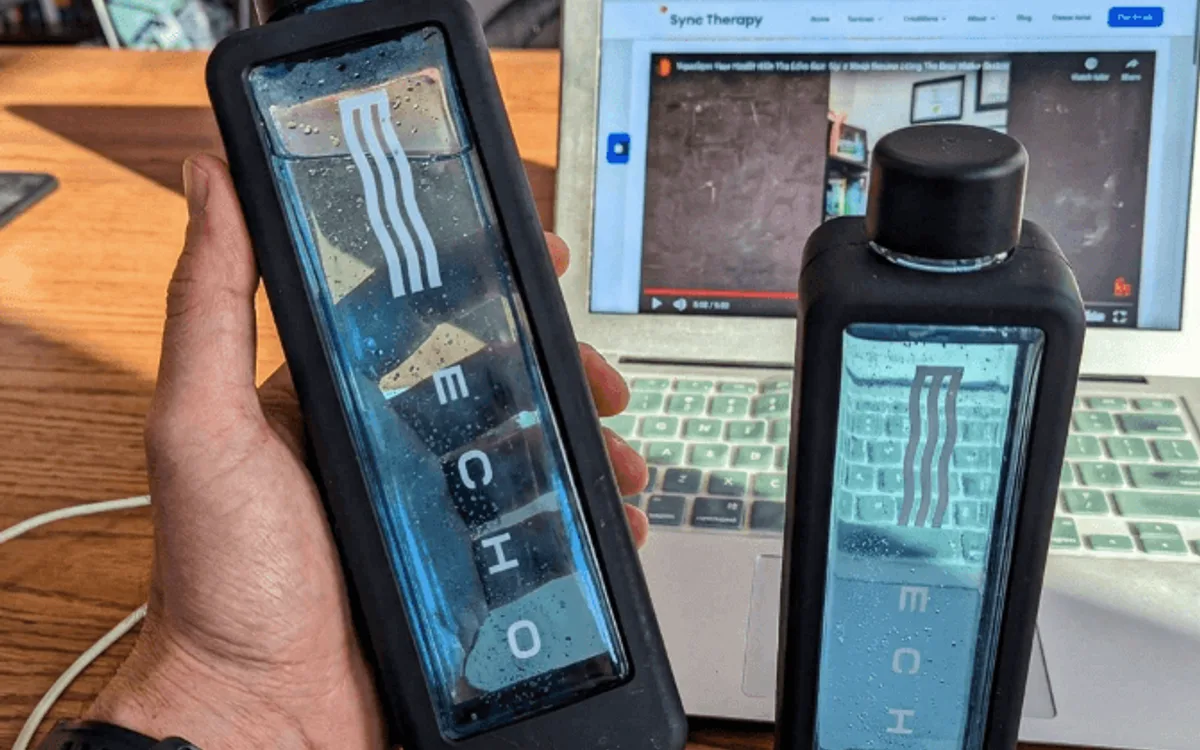
Patients frequently ask how to use the Echo Flask properly for recovery. As an Athletic Therapist and clinical researcher, I evaluate hydration technology based on measurable outcomes. The Echo Flask delivers therapeutic levels of molecular hydrogen when operated correctly. I use this bottle daily and track its impact on patient rehabilitation. This guide covers setup, daily operation, and maintenance.
Direct Verdict
I use the Echo Flask daily and recommend it to patients dealing with oxidative stress. Its ability to generate up to 8 PPM of dissolved molecular hydrogen makes it a reliable tool for cellular recovery. The solid build quality and SPE/PEM technology set the benchmark for portable hydrogen generators.
Quick Start: Echo Flask in 5 Minutes
For immediate use, follow this protocol:
- Charge the battery: Connect the USB-C cable and charge for 2 to 4 hours before first use.
- Fill with filtered water: Use filtered, reverse osmosis (RO), or distilled water, with a 12 oz maximum.
- Seal the lid: Push down and twist the cap securely to maintain internal pressure.
- Power on: Tap the base button to wake the LCD touch screen.
- Select a cycle: Choose 5, 10, or 20 minutes and let the electrolysis finish.
- Drink or store: Consume immediately for highest potency, or keep sealed. The bottle retains hydrogen for over 10 hours under pressure.
Step-by-Step: Operating the Echo Flask
Here is the complete operating procedure:
Step 1: Charge Before First Use
The Echo Flask uses a 2000 mAh lithium-ion battery. A full initial charge calibrates the battery management system for long-term reliability.
- Initial charge: Plug it in for 2 to 4 hours continuously.
- Charging cable: Use the provided USB-C cable.
- Power adapter: Connect to a standard 5V-2A charging block.
- Avoid fast chargers: High-wattage phone fast chargers can degrade the battery cells over time.
- Battery indicator: The LED glows solid green once charging completes.
You can expect up to 7 maximum-length generation cycles per charge. Consistent charging preserves battery life during active electrolysis.
Step 2: Fill with the Right Water
The Echo Flask holds 12 ounces (350 mL) of water. The type of water you use directly affects the lifespan of the electrodes.
- Recommended water: Use only filtered, reverse osmosis (RO), or distilled water.
- Fill line: Fill to the maximum fill mark without overfilling the chamber.
- Temperature: Cold or room-temperature water works best. Lower temperatures increase the solubility of hydrogen gas.
Clinical Warning: Never use tap water. Tap water contains dissolved minerals like calcium and magnesium that deposit onto the platinum-coated electrodes. This scaling degrades the Proton Exchange Membrane (PEM) and halts hydrogen production over time.
Step 3: Close the Lid Securely
The Echo Flask builds internal pressure up to 60 PSI during an active cycle, forcing hydrogen gas to dissolve into the water.
- Firm closure: Push the lid down and turn until it locks in place.
- Seal check: Confirm the silicone O-ring sits flat against the glass rim.
- During cycle: Keep the bottle closed while electrolysis is running.
If the seal is loose, hydrogen escapes into the air, reducing final concentration.
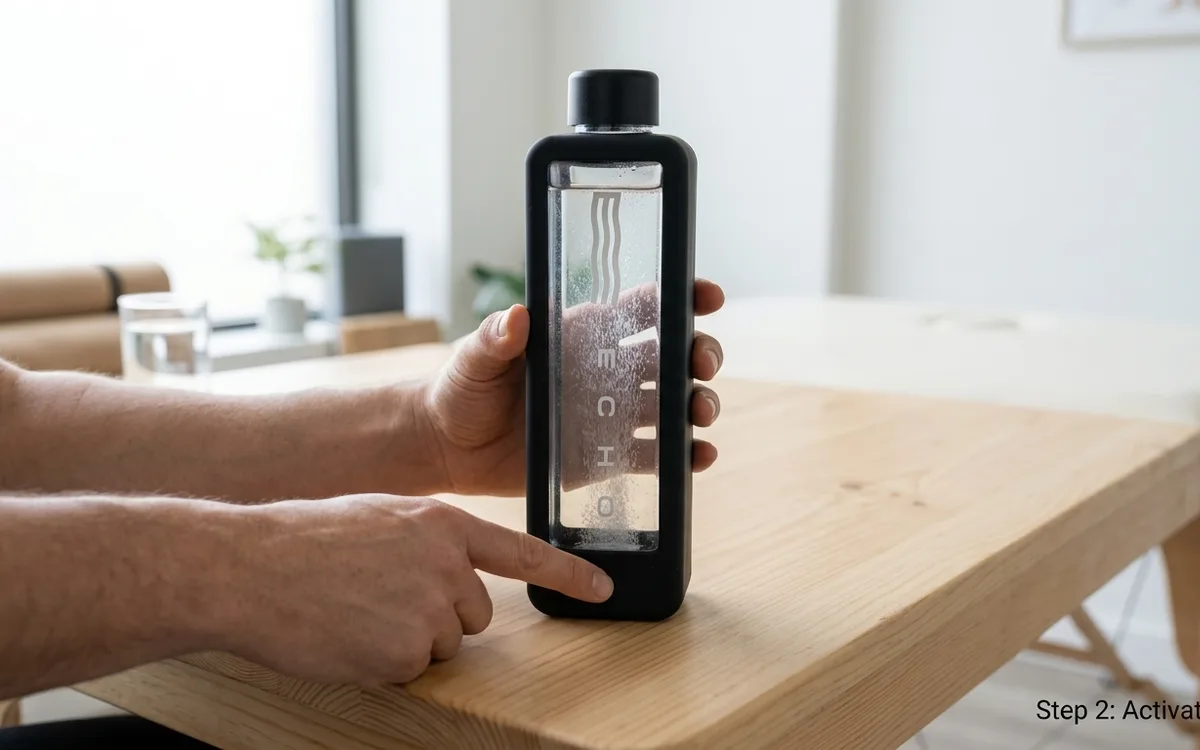
Step 4: Power On the Echo Flask
Turn on the generator with a single press:
- Power button: Press the physical button on the base unit once.
- LCD touch screen: The digital interface illuminates immediately.
The screen displays cycle options, battery status, and Bluetooth connection.
Step 5: Choose Your Cycle Length
The device includes three cycle durations:
| Cycle | Time | H₂ Concentration | Best For |
|---|---|---|---|
| Quick | 5 min | ~3-4 PPM | Fast hydration |
| Standard | 10 min | ~6 PPM | Daily use |
| Maximum | 20 min | ~8 PPM | Therapeutic use |
- Selection: Tap your preferred cycle on the screen.
- Start: Press "Start" to begin electrolysis.
For general daily hydration, the 10-minute cycle works well. For muscle soreness (DOMS) or systemic inflammation, run the 20-minute cycle to reach the 8 PPM mark.
Step 6: Wait for Cycle Completion
The generator runs quietly during the cycle:
- During cycle: Keep the bottle standing upright and undisturbed.
- Visual cues: Fine micro-bubbles will rise from the titanium-platinum plate.
- Completion: The display reads "Done" when the timer expires.
- Pressure release: Wait a few seconds for pressure to equalize before opening.
Step 7: Drink or Store
Molecular hydrogen is a light gas that disperses quickly in open air.
Drink the water promptly after opening to get maximum H₂ absorption. If you are taking it on the go, keep the lid locked. The pressure-sealed chamber maintains therapeutic hydrogen levels for over 10 hours.
Pros & Cons of the Echo Flask
Pros:
- Generates up to 8 PPM dissolved hydrogen concentration.
- Borosilicate glass body with a reinforced metal base.
- Solid SPE/PEM membrane separates hydrogen from oxygen and vents byproduct gases.
- LCD touch display and companion app support.
- Retains gas concentration for 10+ hours when sealed under pressure.
- Provides reliable recovery and joint comfort support.
Cons:
- Requires pure distilled or RO water for long-term maintenance.
- Priced higher than basic entry-level bottles.
- Needs regular cleaning cycles to keep electrodes clear of buildup.
The Science Behind Molecular Hydrogen
Molecular hydrogen (H2) acts as a selective antioxidant. It reacts with damaging hydroxyl radicals without disrupting beneficial reactive oxygen species (ROS) needed for normal cellular signaling.
Oxidative stress drives muscular fatigue and slows down tissue repair. By neutralizing reactive free radicals, H2 helps protect mitochondrial function, supporting post-workout recovery, joint comfort, and consistent daily energy.
Using the Echo Flask App
The mobile application tracks hydration metrics and controls bottle settings:
- Download: Install "Echo Flask" from the iOS App Store or Google Play.
- Bluetooth: Enable Bluetooth on your phone.
- Power on: Turn on the bottle display.
- Pairing: Follow the prompt on the screen to pair the device.
The app tracks daily water intake, allows cycle scheduling, and receives firmware updates.
How to Clean the Echo Flask
Regular cleaning prevents mineral scaling and keeps the PEM membrane working efficiently.
Weekly Cleaning
- Rinse: Flush the glass chamber with warm water.
- Wash: Add a drop of mild unscented dish soap.
- Rinse thoroughly: Flush multiple times until all soap residue is gone.
- Air dry: Let the bottle dry with the cap removed.
Monthly Deep Clean
- Cleaning solution: Mix 1 part white vinegar with 3 parts distilled water.
- Fill: Pour the mixture into the glass flask.
- Run cleaning cycle: Select the dedicated "Clean Flask" mode on the touch screen.
- Discard and rinse: Empty the vinegar solution and rinse three times with distilled water.
- Rinse cycle: Run a short 5-minute cycle with plain distilled water and pour it out before normal use.
Important care rules: Do not use bleach, abrasive sponges, or submerge the USB charging port. Keep the pressure lid out of the dishwasher to protect the silicone seal. See our full Echo Flask cleaning guide.
Tips for Maximum Hydrogen Output
- Use chilled water: Cold water dissolves and holds hydrogen gas more effectively than warm water.
- Keep sealed: Tighten the cap immediately after running a cycle.
- Use 20-minute cycles: Select the 20-minute setting when you want peak 8 PPM output.
- Maintain headspace: Leave a small air gap below the fill line for proper pressure expansion.
"The most common mistake with the Echo Flask is opening the cap immediately and leaving it uncovered. I run a 20-minute cycle in the morning, seal the lid, and bring it to clinic. By lunchtime, it still tests above 5 PPM because the pressurized seal holds the gas in solution." Daryl Stubbs, CAT(C), Clinical Researcher
Troubleshooting Common Issues
- Low bubble production? Run a vinegar cleaning cycle to remove mineral scaling from the electrodes. Verify you are using pure RO or distilled water.
- Bottle won't turn on? Connect to a standard 5V-2A charger for at least 30 minutes. Check the USB-C port for dust or lint.
- Water leaking from base or cap? Inspect the silicone O-ring for alignment or tears, and make sure water does not exceed the max fill line.
- App connection drops? Restart the flask, toggle Bluetooth on your phone, and relaunch the app.
For detailed diagnostic steps, check our Echo Flask troubleshooting guide.
Related Articles
- Echo Flask Full Review
- Echo Flask Cleaning Guide
- Echo Flask Troubleshooting Guide
- Best Hydrogen Water Bottles
- Hydrogen Water Science Guide
Reviewed by: Daryl Stubbs, CAT(C), Clinical Nutritionist
Athletic Therapist with 12+ years clinical experience integrating recovery modalities.